Archive

Tag Archives: steel sandwich

Will try to leave the extraneous details out so that this actually gets posted.

The Steel Sandwich hasn’t been touched since December, but a test at 450°F, wrench-tightened, for 30 minutes gave the best transfer yet—except that the copper was so oxidized as to be purple. But I didn’t try to etch it. It might have still worked. Will pick that one up at some point.

I got a credit for the Dangerous Prototypes free PCB drawer and snagged a bare Bus Pirate 3.8 board. If you haven’t heard of the Bus Pirate, look it up—it’s a fine digital exploration, analysis, and prototyping tool.

I have an order in for all of the parts, plus a couple of hand tools I needed and some parts that I think will be useful for the universal PIC ICSP adapter thing I keep touching on here. I hope I can keep my hand steady enough to solder all of those surface-mount parts.

I’ve also ordered a few of the PIC16F527, a relatively recent addition to the PIC 12-bit line, which is only a small amount more expensive than the PIC16F57 (the current cheapest 16F) and has more I/O pins and an onboard precision 8MHz oscillator. That last bit means saving a couple of cents from omitting the external RC, improving the viability in timing-sensitive applications, and simplifying PCB layout. The additional I/O also means that, in some cases, a shift register (like 74HC595) or port expander can be eliminated. Overall, probably worth the extra 19 cents.

Finally, for Valentine’s Day, my wife initiated my membership to Club Cyberia, the only hackerspace I’ve ever heard of in this vicinity. I’m interested to see what difficulties this might help alleviate.

(Continued from Part I.)

I lead with two developments that required an additional shopping trip—on Hack Friday, no less.

First, I discovered that there could be some situations in which the holes on the two opposing corners of the plates turn out to be insufficient. In particular, the board may need to be of a minimum size and placed symmetrically across the line between the two bolts; otherwise the pressure over the surfaces of the board may be uneven. One remedy for this could be to restore balance with a spacer of the same thickness, such as a scrap piece of the same copper-clad.

Another fix could be to forget about the holes and secure the board more evenly (for example, on each of the four corners) with some sort of clamps. This might be more generally applicable since it could be adapted to larger plates that do not already have holes. So, I had to identify something that would be useful as a clamp that is also inexpensive and capable of surviving being baked. A small steel beam clamp in the electrical section of Chain Home Improvement Store seemed like it could fit the bill for under $1 apiece.

Second, my wife vetoed my use of the oven in the kitchen. This is completely understandable—we use it for food, and the hardware I’ll be heating, not being graded for food safety, could potentially produce all sorts of unfriendly gases and residues. This is a job for a garage oven, and that means a toaster oven. Fortunately, a fancy one isn’t necessary—an arbitrary box that semi-steadily holds its content at a set temperature is all we need. Much-Maligned Chain Department Store stocks a $15 firestarter model. They were out of stock, so I upgraded to the $20 firestarter model.

Supplies

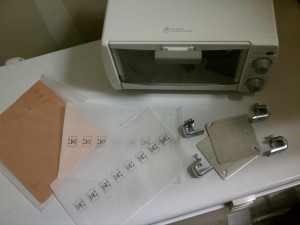
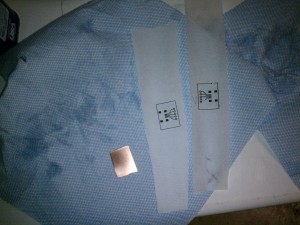
The ragtag bunch of misfits. Clockwise from top: Toaster oven, steel beam clamps, steel electrical work box cover plates, USB mini-B breakout board patterns on baking parchment, double-sided copper-clad PCB blanks.

So, on to the first experiments executed this evening.

I started by printing the layout of Sparkfun’s USB mini-B breakout board several times over on baking parchment paper. I selected this board because it’s small and thus suitable for repeated trials. (As a bonus, I actually need one; I’ve got a couple of the connectors collecting dust in a drawer.)

Parchment

Left to right: A freshly cleaned piece of copper-clad, a nicely printed pattern on parchment, and one that didn’t come out so nicely.

Printing on parchment is tricky. It is something that you can get to work, but it may take a few tries. Parchment paper is coated with silicone, making it difficult to stick anything to. The fact that the paper releases easily is a desirable property for a toner transfer backing, but it does its job perhaps a little too well. Traces printed this way may not stick long enough to fuse correctly, resulting in smears and runs. When a pattern does take correctly, it must be handled somewhat delicately, as it can scratch or flake off without much of an impact. Still, since someone has gotten it to work[1], I think this can be a reasonably useful medium if you have some patience, and it’s certainly priced to sell (sold by the roll in your grocery store of choice).

I may include the other common media (magazine paper, inkjet glossy photo paper) in future experiments.

Incidentally, any sort of slick tape appears to be a bad choice for attaching the medium to ordinary paper; it being all I had at the moment, it caused more paper jams than I’ve ever encountered with this printer. I’ve had more success with matte tape[2].

I cut the copper-clad for the board and gave it a light cleaning with a soft abrasive[3] before building the apparatus around it.

Patterns, board, and one plate

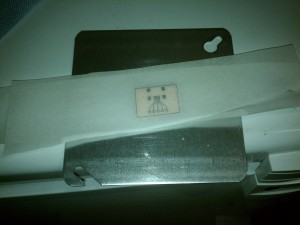
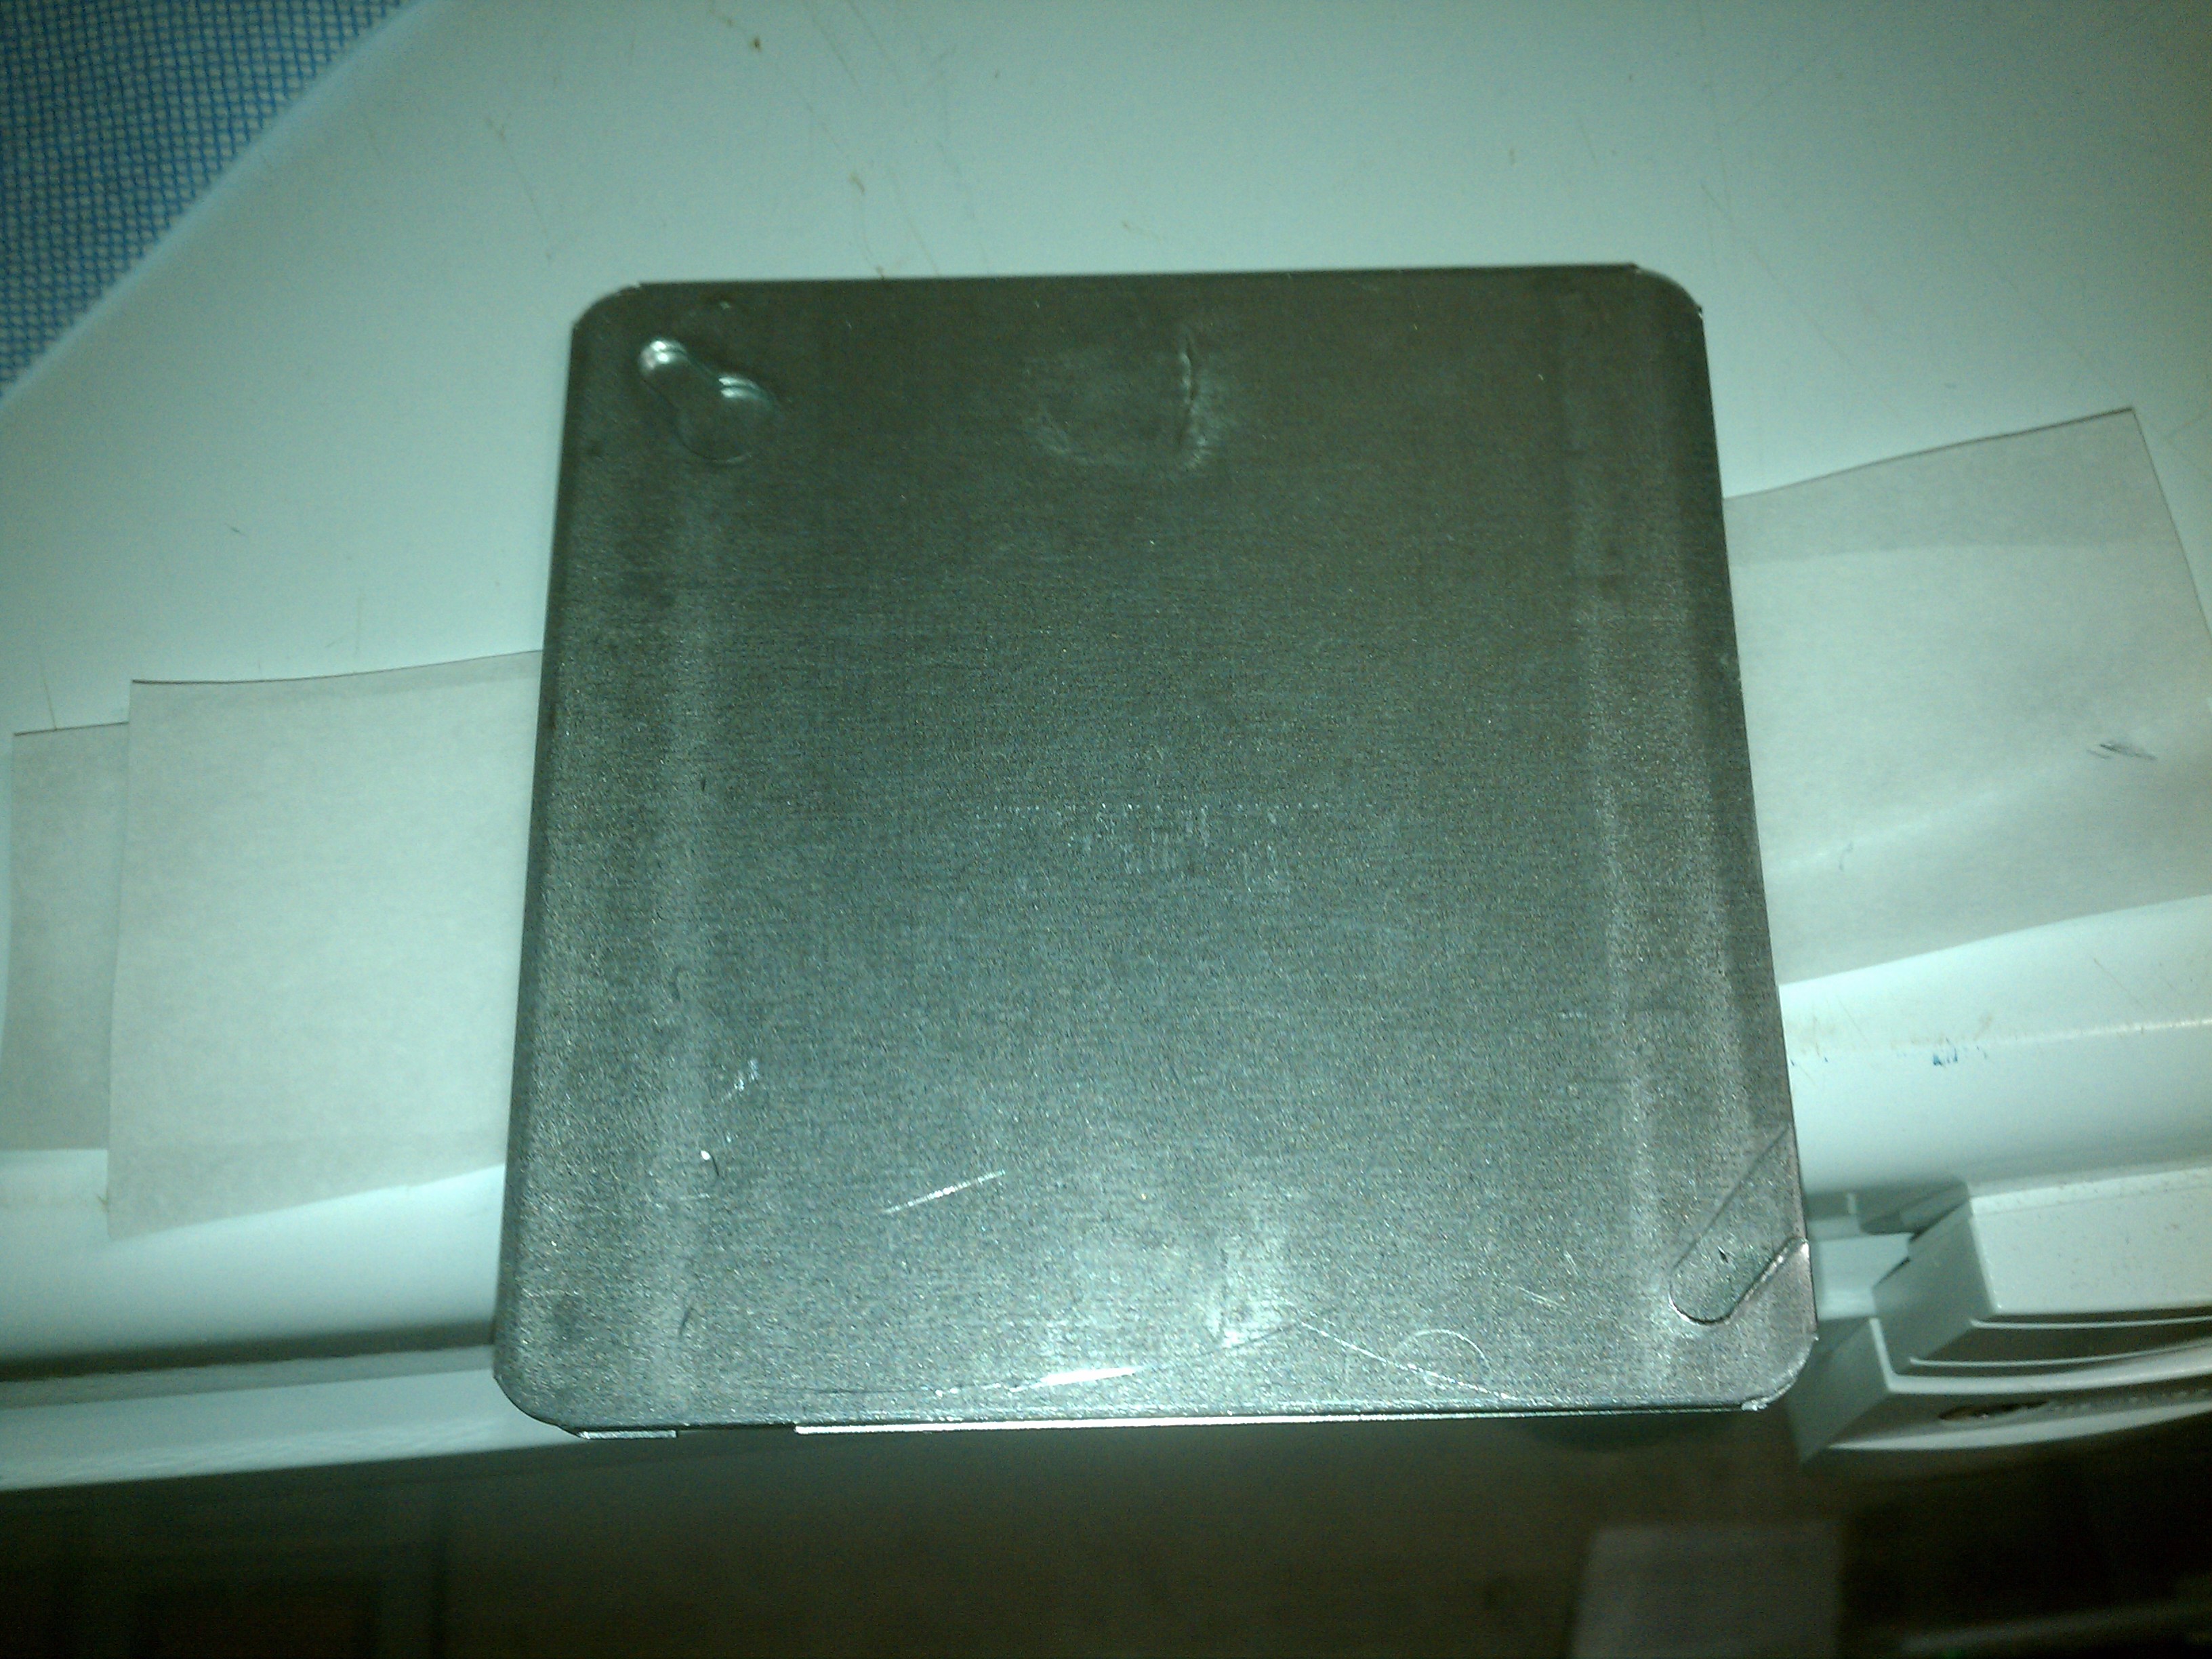
Copper-clad between two patterns on top of the bottom plate.

One copy of the pattern was placed on either side of the board. The registration wasn’t given too much attention because that isn’t the point of the current experiment (I’ll work on it once I have the adhesion process working), and because the patterns are both the same rather than flip sides of a double-sided board. To conserve the clearly printed copies of the pattern, a misprinted copy of the pattern was used on one side.

Apparatus with top plate

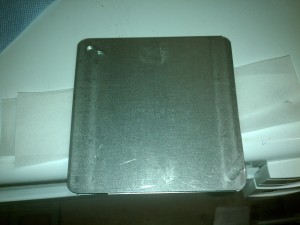
All of the above plus the top plate.

The board and patterns were laid down onto one of the steel plates, then the other plate was placed on top.

Apparatus with clamps

Clamps are added to press everything together.

The steel clamps were added to the edges of this sandwich and the bolts tightened.

Apparatus in oven

The smell of fresh-baked productivity. (But seriously, try not to inhale any fumes.)

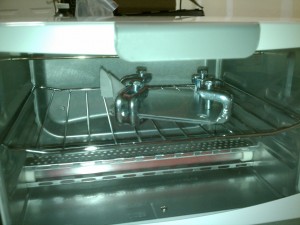
The full apparatus was then placed on the top rack of the preheated oven (there are two heating elements situated at the top and bottom, so the bake should be fairly even regardless) and baked for a specified amount of time.

Quenching the assembly

If lowered into the water slowly, there is audible boiling. If dropped quickly, as shown, you end up with a watery mess. Some sort of middle ground is probably a good idea.

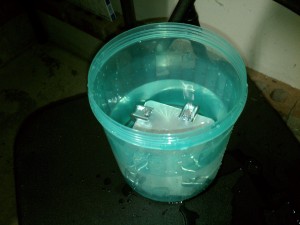
Afterward, the assembly is removed from the oven and immersed in cool to tepid water, bringing it to a safe temperature for handling.

The results are examined immediately. The medium is removed without any special degree of care; any toner dislodged by normal handling cannot be considered to have adhered properly.

The variables I’m currently seeking to study are:

  • Bake time
  • Bake temperature
  • Clamp pressure

For tonight’s experiments, I decided on:

  • Trials of 10 and 30 minutes
  • Temperature of 350°F (setting of the oven, not measured temperature)
  • Clamp pressure resulting from tightening the bolts as far as I could using only my fingers, rather than a wrench.

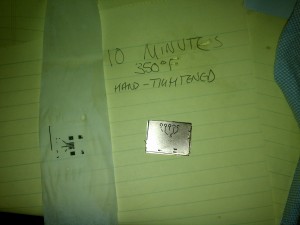
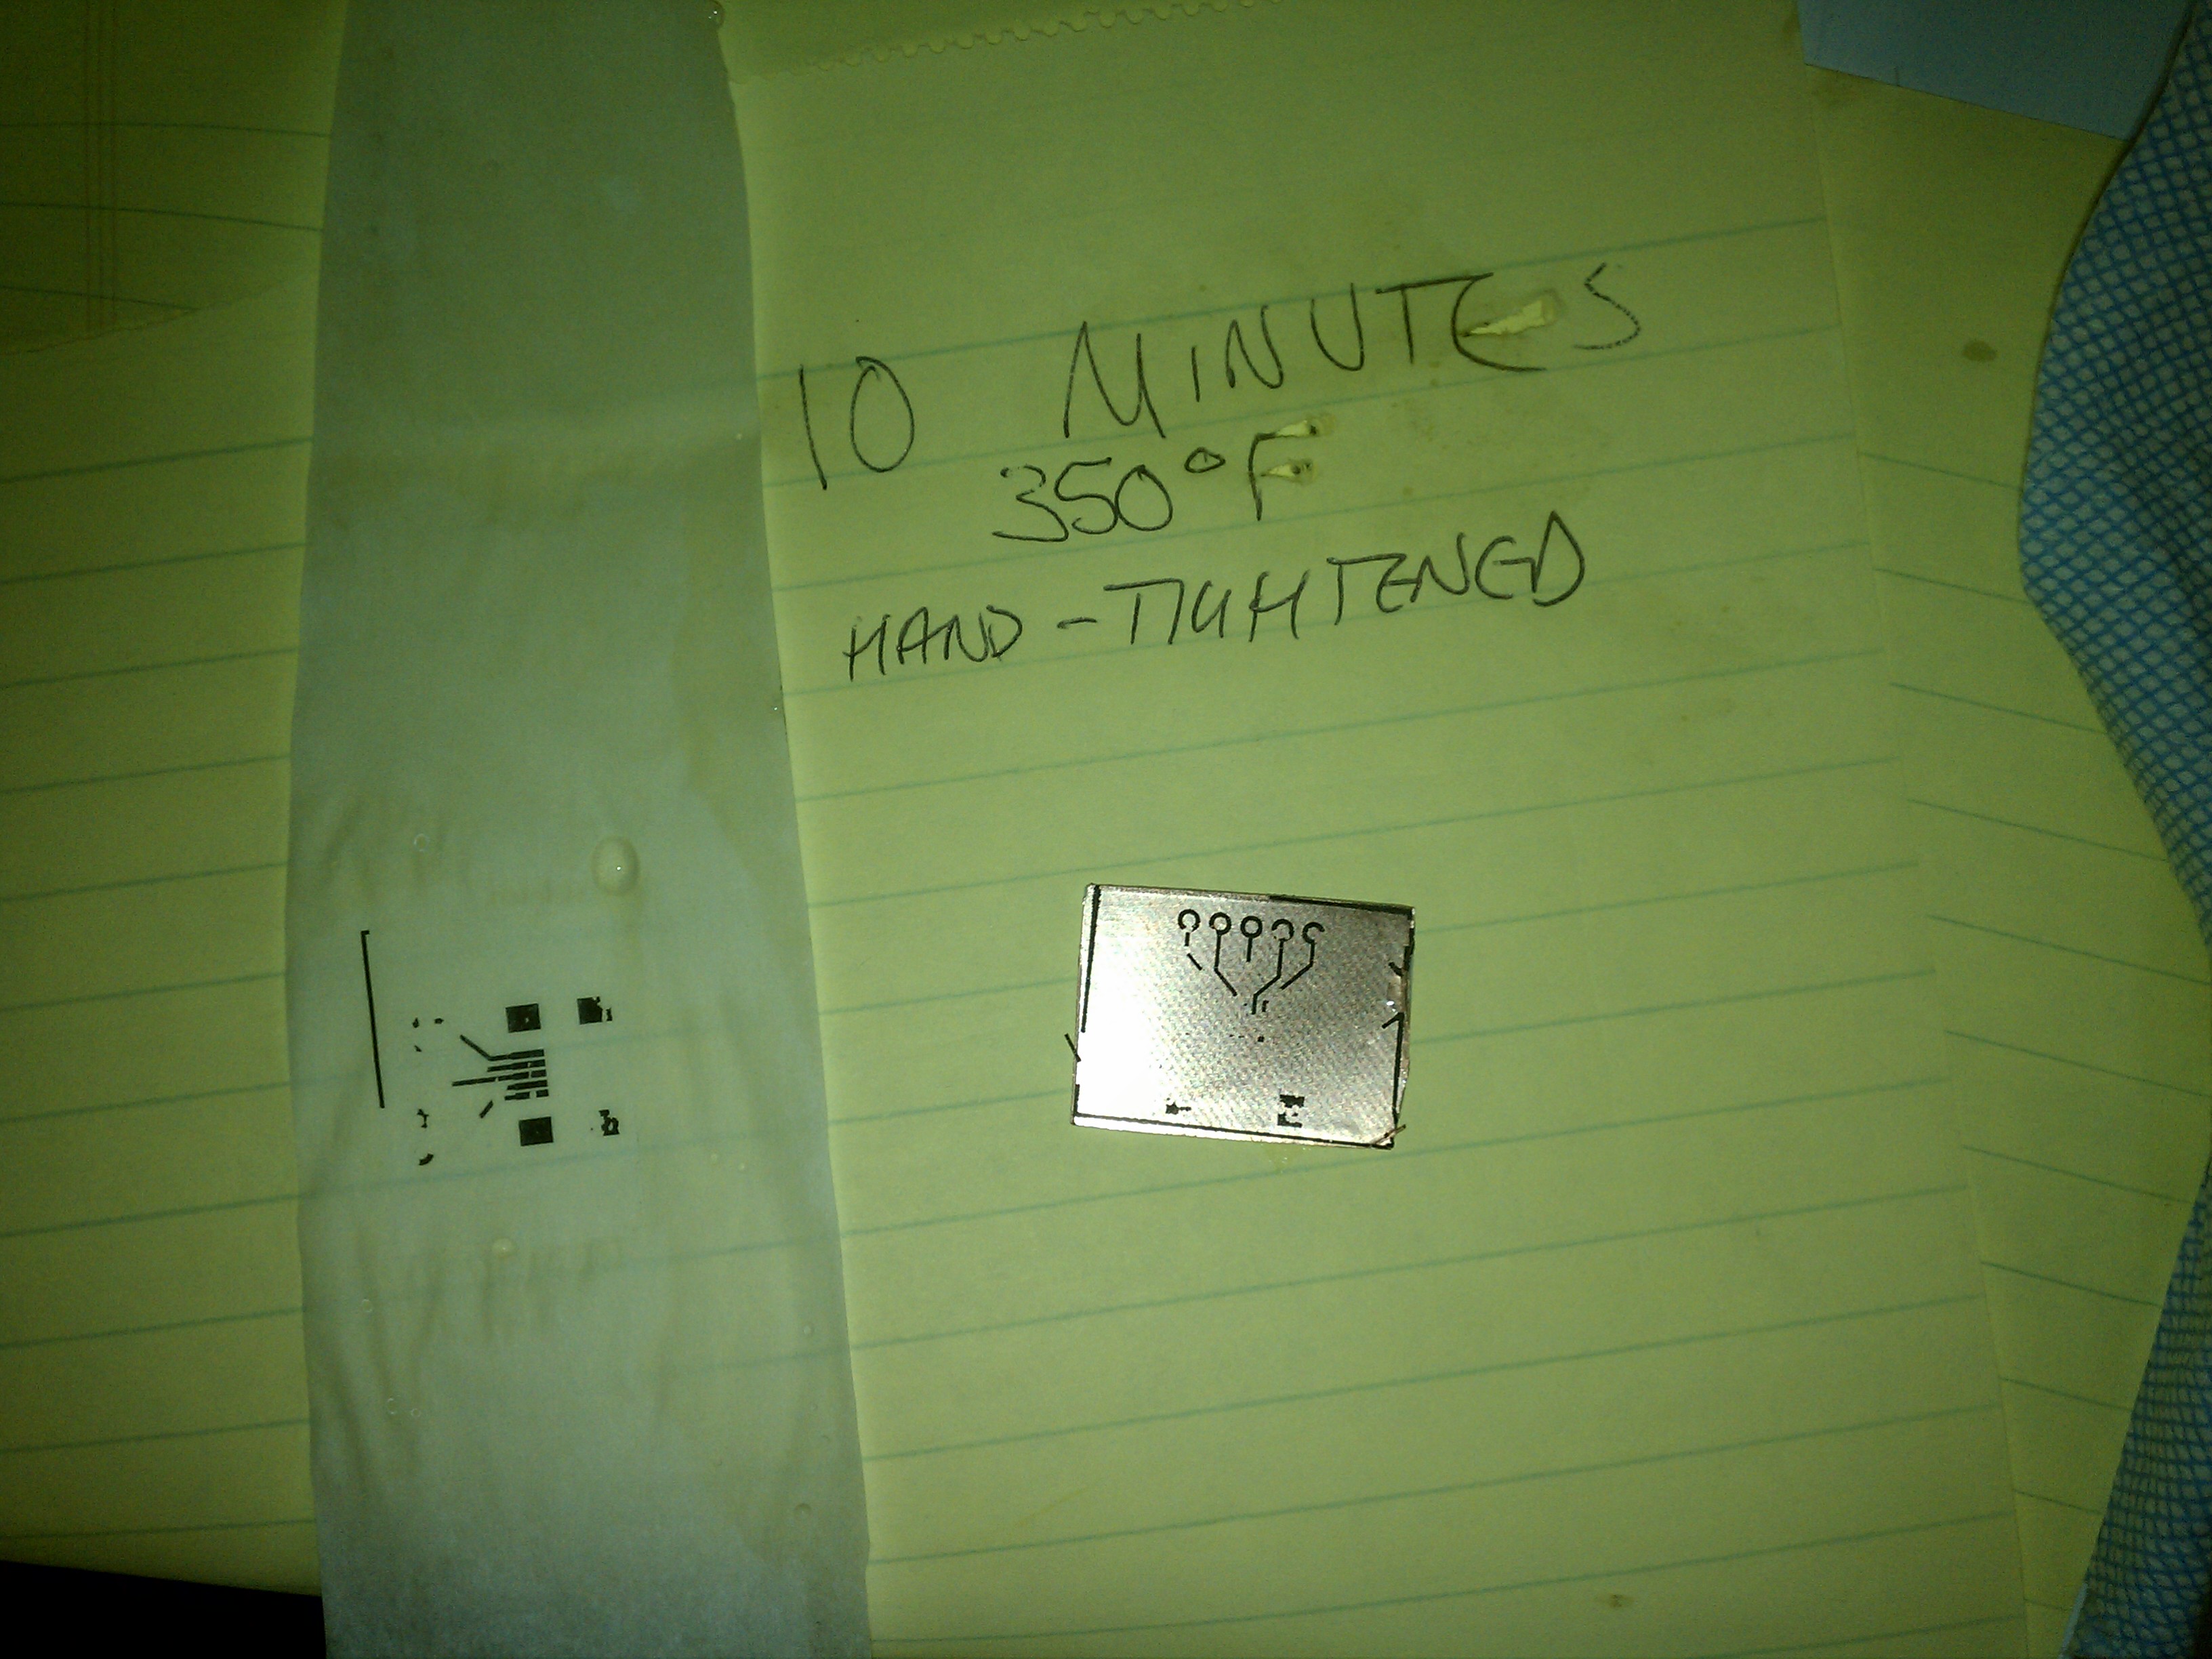
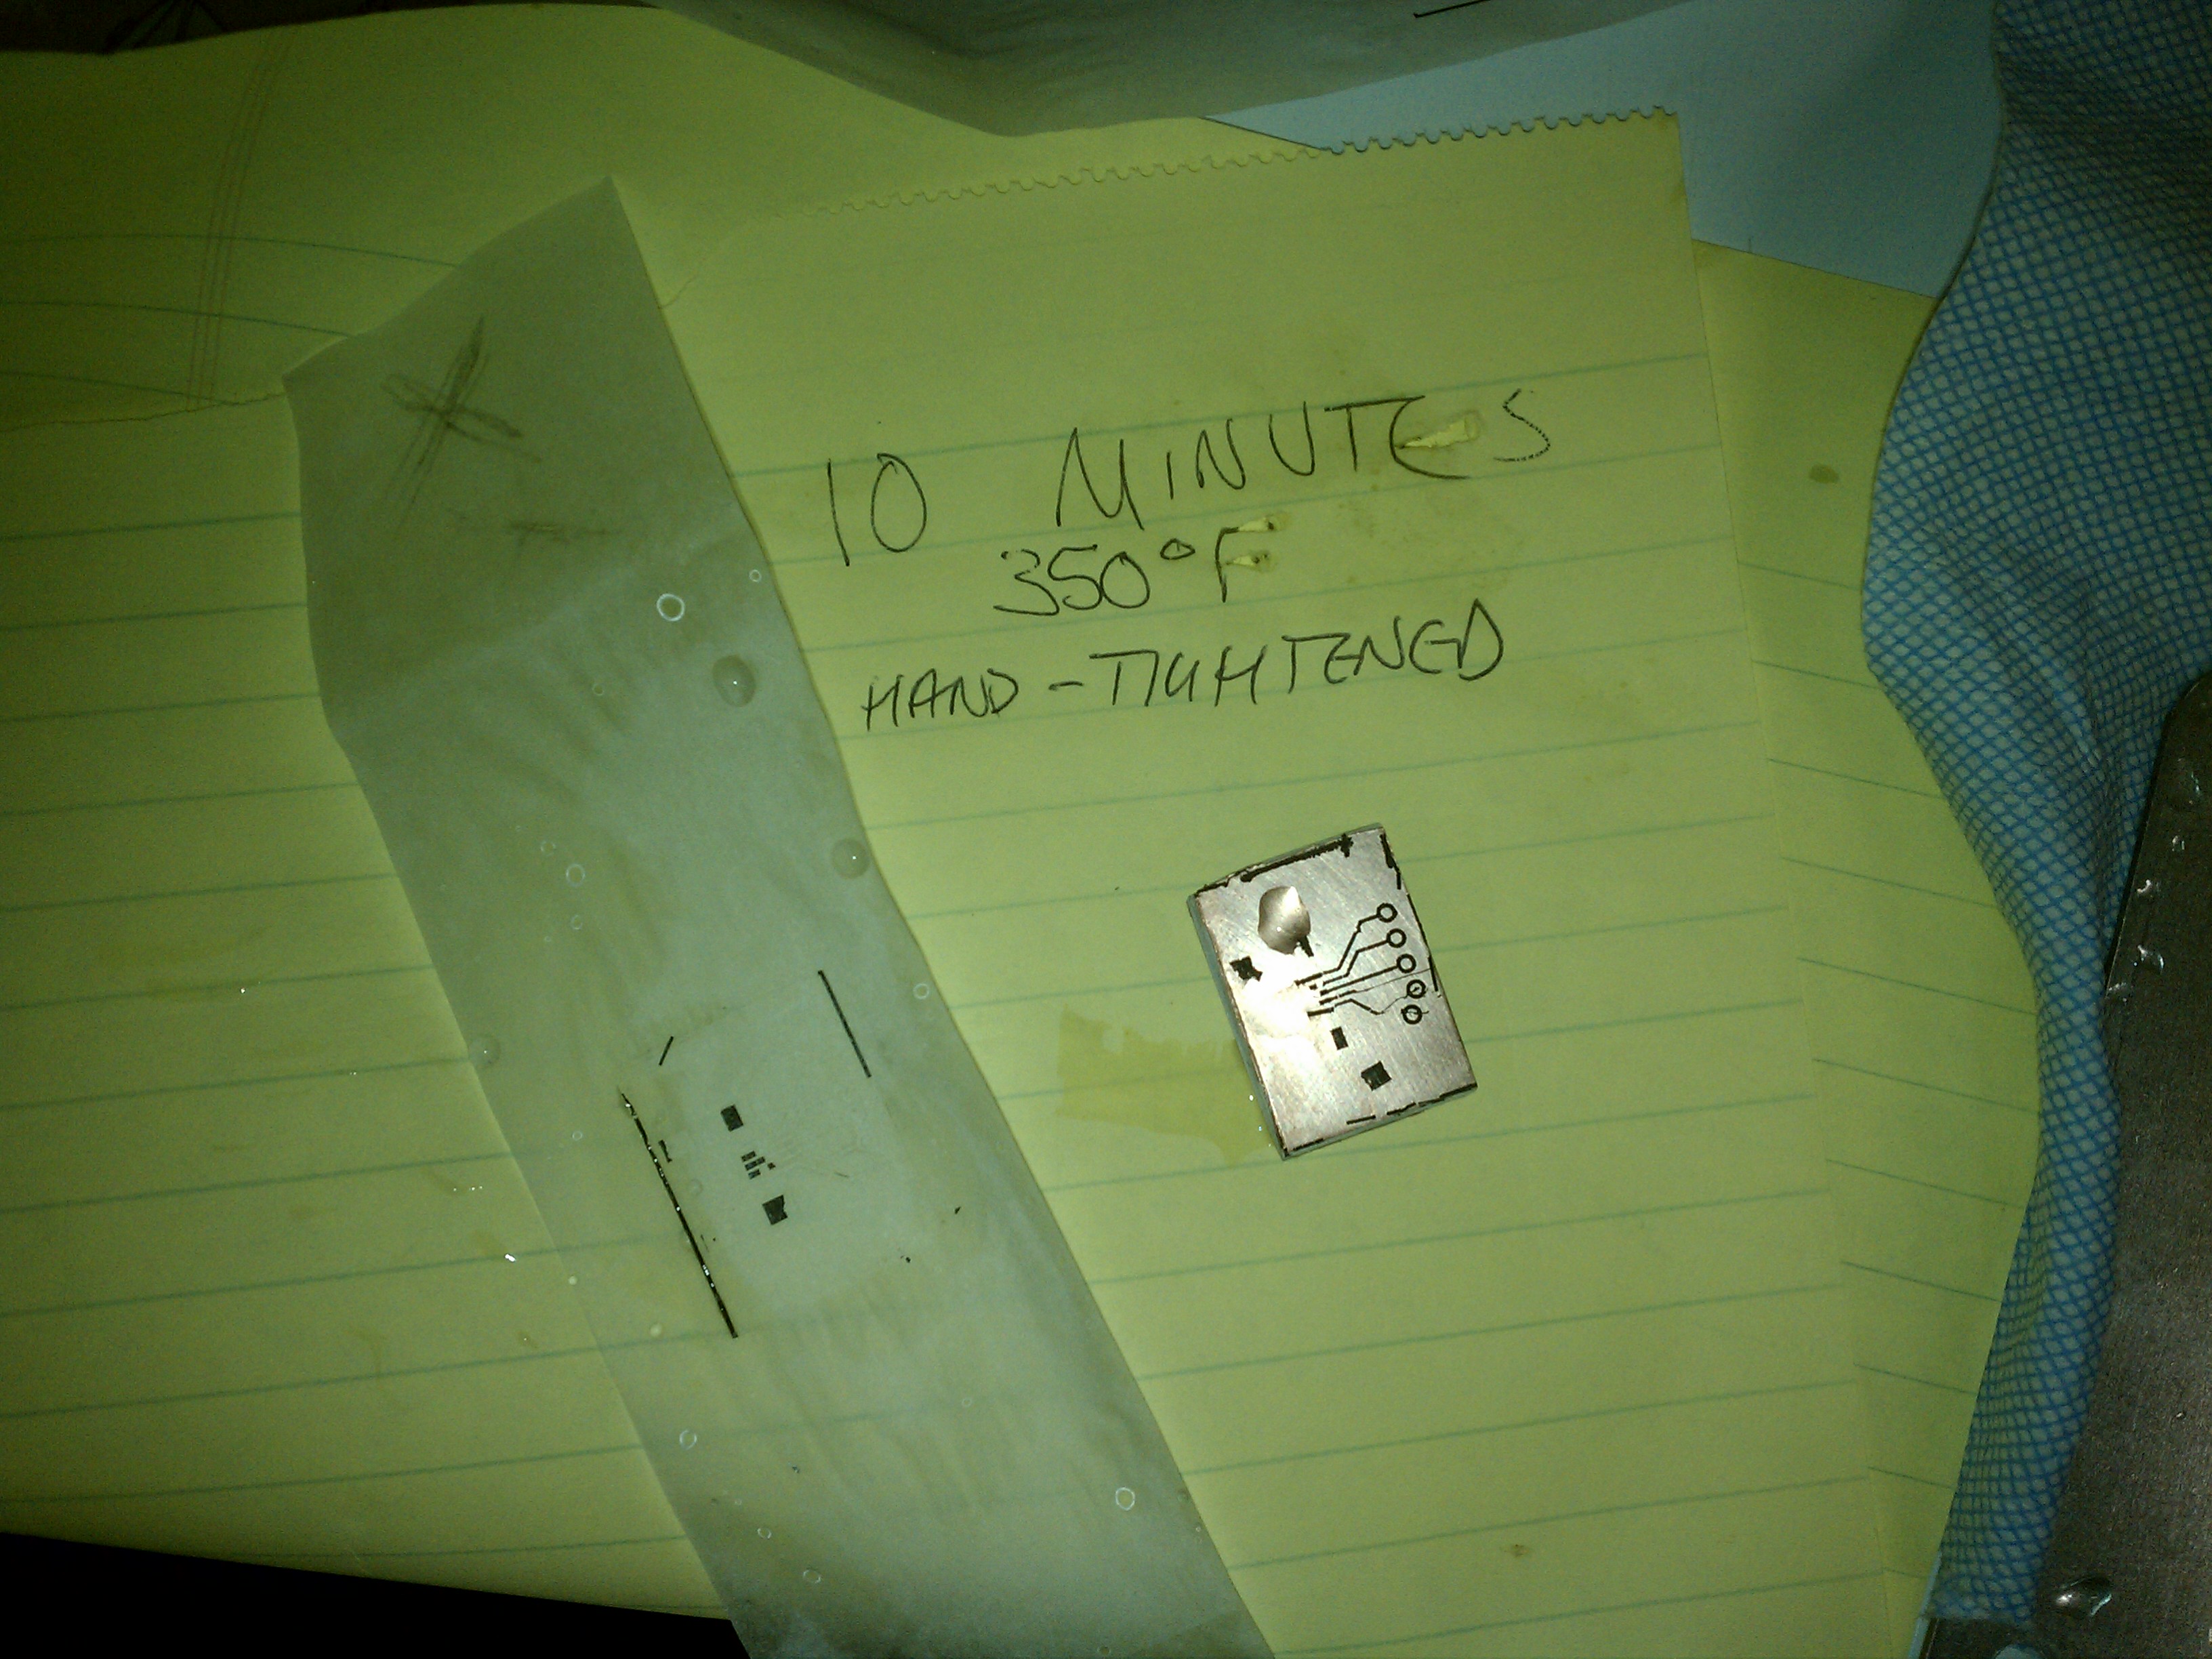
10-minute trial, proper side.

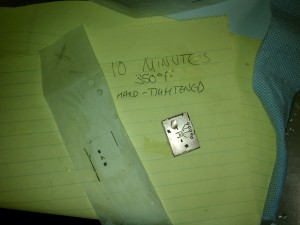
10-minute trial, misprint side.

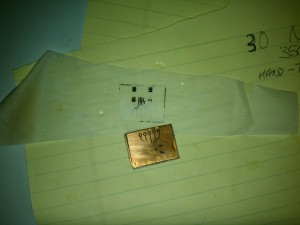
30-minute trial, proper side. Note that the extra time has discolored the copper somewhat.

30-minute trial, misprint side.

Put briefly, neither result was quite satisfactory, but I believe I’m on the right track. The 10-minute trial gave a better result than I’ve achieved with an iron and parchment. The 30-minute trial was somewhat better, but not so much so that I think adding more time is the key. The toner that did transfer was clear and crisp with no real smudging, which to me indicates that we could afford to apply more pressure. So, it’s likely that the next experiment will be a repeat of tonight’s, except using a wrench to tighten the clamps a little harder.

  1. [1]Refer to the Instructable by dustinandrews.
  2. [2]“magic” or “invisible” tape
  3. [3]Bar Keepers Friend soft cleanser.

While lying in bed last night, I was going over in my head everything I could recall having learned about getting a PCB[1] layout out of my computer and onto a piece of copper clad.

At this point in history I’ve managed to successfully iron a toner pattern onto a board only about three times, and each success came at the cost of around ten failures. The glossy photo paper is the only thing I’ve gotten to work; with magazine paper the image was too smudged to use, while with parchment paper hardly any of it stuck (though what did stick was high-fidelity). What has really been frustrating in this whole process is that there are too many variables and not enough correlation. I don’t know whether I haven’t been using enough pressure, waiting enough time, executing the correct motions, or using the right setting on the iron. For all I know, I could just have a crappy iron!

And everyone seems to have something different to try, with the most consistent results apparently from either (a) using a modified laminator for the toner transfer or (b) equipping for photoresist boards. Of the two, I would surely choose the photoresist, in part because it produces truly sharp results but mostly because the failure/success ratio seems to be lower. But both options involve buying new equipment (and in one case ruining it) with no guarantee of out-of-box success, and given the laser printer and copper-clads already in my possession, I’m already well in.

Anyway, I suddenly had an idea that, if it works, combines the even heat and pressure of a laminator with extremely low (new) equipment cost and increased controllability, the latter of which translates into more meaningful experiments and, when an experiment succeeds, more repeatable results.

What I decided was necessary is as simple as this:

  • The patterns are printed in reverse on the medium of choice—for me, it will be parchment paper since it already exists in my house.
  • The board is placed in alignment with the patterns on one or both sides.
  • The board and patterns are placed between two flat plates of rigid metal, such as steel.
  • The plates are bolted together and tightened at least to the point that nothing slides around.
    • Here, the sustained flatness of the plates is important so that the pressure remains fairly even across the entire pattern.
    • If you have any way to gauge it, take note of the tightness or pressure of the plates on the board. This is possibly one of the variables.
  • The oven is set to the target transfer temperature.
    • To be truly scientific about it, use an oven thermometer to ensure the knob is telling the truth.
    • The temperature is certainly one of the variables.
  • The oven is allowed to preheat until up to temperature.
    • My hypothesis is that a consistent result is probably easier to obtain from a preheated oven due to variances in rise time.
  • The plate apparatus is placed in the oven near the heat source.
    • If the apparatus can be hung sideways from the rack, do so allowing equal heat exposure to the two sides.
    • If the oven has a convection mode, it might be worth using.
  • A prescribed amount of time passes.
    • Another variable.
  • The apparatus is removed from the oven.
  • The apparatus is allowed (as by air) or forced (as by water) to cool to a safe temperature for handling.
    • Maybe another variable.
  • The apparatus is disassembled and the results are examined.
    • An effective transfer should stick well enough that it does not lift or flake when the medium is pulled away. Therefore, the medium can be pulled away without being exceedingly gentle.
    • If the result is unsatisfactory, a hypothesis is formed as to why that relates to one of the variables. The variable is adjusted and another attempt is made.

With this basic process in my head, I went to Chain Home Improvement Store to seek something I could use for the plates. What I found was square steel covers for electrical work boxes, in a flat variety with no punchouts. They already have holes for fasteners at two of the corners, and it was only $1 for the pair. I also got #10-24 stainless steel bolts and wingnuts which themselves totaled $4. This setup should adequately accommodate boards up to about 3 by 4 inches (for comparison, the standard Arduino footprint is 2.7 by 2.1 inches).

I now have all the equipment I think I’ll need to give this a shot, and that could happen as early as this weekend (and I’ll try to take photos). I really hope it works, not just because it would be convenient for me, but because it has the potential to lower the blood pressure of many other frustrated hobbyists.

  1. [1]printed circuit board